How to Create PDF Reports?
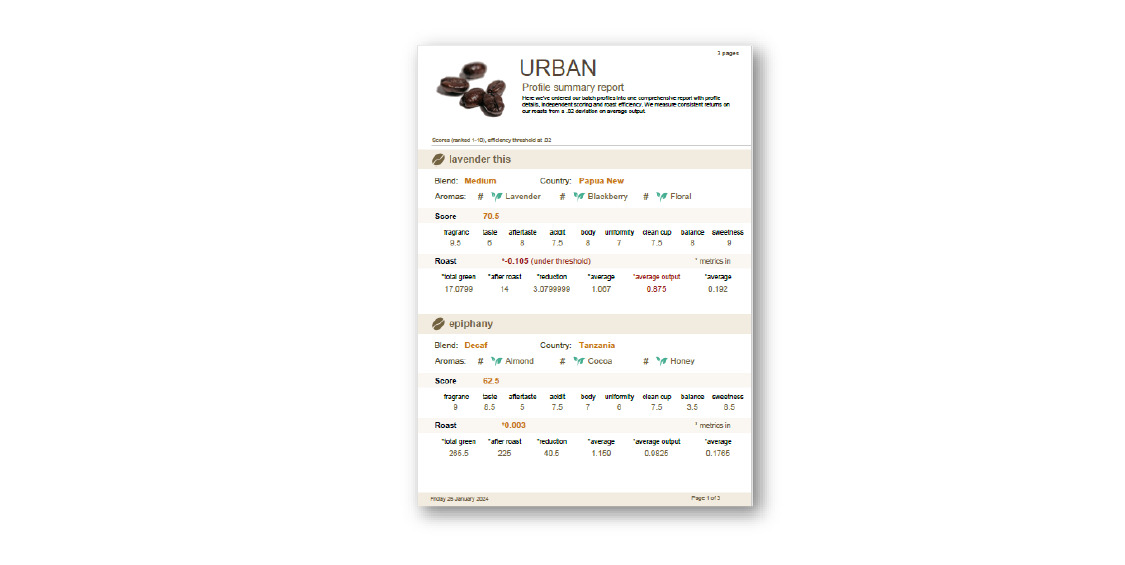
PDF reports are a valuable tool for presenting data insights in an organized and visually appealing manner. They can help simplify complex data and make it easier to understand, which is especially important when making important decisions.
In this article, we will guide you about creating high-quality PDF reports. We will cover everything from designing effective PDF reports for your audience to customizing them for different purposes. We will also explore the tools and techniques for generating PDF reports, including code libraries, custom generators, and reporting tools.

Basics of Creating PDF Reports
Creating high-quality reports is a crucial aspect of any data-driven business. You can create PDF reports using Jaspersoft, which offers a plethora of features to design and customize reports that cater to the diverse needs of your audience.
Before diving into the technicalities of Jaspersoft, it's essential to understand your audience. Who will be reading your reports? What information are they seeking? Tailoring your reports to meet the expectations of your audience is the first step toward creating meaningful and effective documents.
Designing Reports for Impact
The design of your reports plays a crucial role in capturing and retaining your audience's attention. Jaspersoft provides a user-friendly interface for designing visually appealing reports. Utilize its drag-and-drop features to arrange elements intuitively. Pay attention to color schemes, fonts, and layout to ensure clarity and coherence.
Avoid cluttered designs that may confuse your audience. Instead, focus on presenting key insights in a structured and easily digestible format.
Step-by-Step Guide: Creating PDF Reports
Creating PDF reports in Jaspersoft is a streamlined process that involves designing, customizing, and deploying reports to meet the specific needs of your audience. Follow this detailed step-by-step guide to navigate the Jaspersoft interface and generate high-quality PDF reports.

Step 1: Install Jaspersoft Studio
If you haven't installed Jaspersoft Studio, download and install it on your machine. The installation process is straightforward and typically involves following the prompts in the setup wizard. Once installed, launch Jaspersoft Studio to begin creating your PDF reports.
Step 2: Create a New Report
- Open Jaspersoft Studio and click "File" in the menu.
- Select "New" and "Jasper Report" from the dropdown menu.
- Specify a name for your report and click "Next."
Step 3: Design Your Report
Jaspersoft Studio provides a user-friendly design environment for creating visually appealing reports.
A. Design Elements
- Drag and drop text fields, images, and charts onto the report canvas.
- Arrange and resize elements to achieve a clean and organized layout.
B. Data Source Configuration
- Configure your data source on the "Data Adapters" tab.
- Add a new JDBC data adapter or connect to your desired source.
- Define queries using SQL or HQL to retrieve the necessary data.
Step 4: Customize Report Parameters
Enhance the interactivity of your reports by incorporating parameters.
- Click on the "Parameters" tab.
- Add parameters like date ranges or categories relevant to your report.
- Set default values and specify whether parameters are mandatory.
Step 5: Implement Conditional Formatting
Highlight important information in your report using conditional formatting.
- Select the element you want to format.
- Navigate to the "Properties" tab and click "Conditional Styles." 3. Define rules based on data values and apply formatting options.
Step 6: Preview Your Report
Before exporting to PDF, preview your report to ensure everything looks as expected.
- Click on the "Preview" tab to see how your report will appear.
- Interact with parameters if applicable to test dynamic changes.
Step 7: Export to PDF
Once satisfied with your report design, export it to PDF for distribution.
- Click on "File" in the menu.
- Select "Export As" and choose "PDF."
- Specify export settings, such as page size and orientation.
- Click "Finish" to generate the PDF report.
Step 8: Deploy Reports to Jaspersoft Server
For centralized access and management, deploy your reports to a Jaspersoft server.
- Connect to your Jaspersoft server within Jaspersoft Studio.
- Right-click on your report and choose "Publish."
- Specify the server location and credentials.
- Click "Finish" to deploy the report to the server.
Step 9: Access Reports via Jaspersoft Server
Users can access and view the reports through a web browser.
- Open a web browser and navigate to the Jaspersoft server.
- Log in with appropriate credentials.
- Click on the deployed report to view or download the PDF.
Congratulations! You've successfully created, customized, and deployed a PDF report in Jaspersoft. This step-by-step guide should empower you to leverage the robust features of Jaspersoft Studio for efficient and visually appealing reporting.
Customization for Varied Purposes
Reports serve diverse purposes across different business functions. Jaspersoft empowers you to customize reports for specific needs, whether financial analysis, sales tracking, or performance monitoring.
Customizing PDF reports in Jaspersoft allows you to tailor the appearance and functionality of your reports to meet specific requirements. Follow this detailed step-by-step guide to explore the customization options available in Jaspersoft Studio.
Step 1: Open Existing Report
- Launch Jaspersoft Studio and open the report you want to customize.
- If you don't have a report, follow the previous guide to create one.
Step 2: Navigate to Design View
- Click on the "Design" tab to access the design view of your report.
- This is where you can adjust the layout and appearance.
Step 3: Customize Report Elements
A. Adjusting Element Properties
- Select a report element (text field, image, chart, etc.).
- Right-click and choose "Properties" to modify its properties.
- Modify font, color, size, and other relevant properties.
B. Adding and Removing Elements
- Drag them from the palette onto the report canvas to add new elements.
- Select them and press the "Delete" key to remove elements.
Step 4: Implement Conditional Formatting
Enhance your report's readability by applying conditional formatting.
- Select an element (e.g., a text field).
- Go to the "Properties" tab and click "Conditional Styles."
- Define conditions and formatting rules based on data values.
Step 5: Customize Report Parameters
Adjust report parameters to enhance user interactivity.
- Navigate to the "Parameters" tab.
- Modify existing parameters or add new ones.
- Set default values and adjust display options.
Step 6: Page Layout and Formatting
Control the overall look of your PDF report by adjusting page layout and formatting.
- Click on the "Report Inspector" tab.
- Right-click on the report name and choose "Properties."
- Modify properties such as page size, orientation, and margins.
Step 7: Grouping and Sorting
Organize your data effectively using grouping and sorting options.
- Click on the "Outline" tab.
- Right-click on the desired element (e.g., a field in the Detail band).
- Choose "Add Group" or "Sort."
Step 8: Preview Your Customizations
Before exporting the report, preview your changes.
- Click on the "Preview" tab.
- Interact with parameters to simulate different scenarios.
Step 9: Export the Customized Report to PDF
Once satisfied with the customizations, export the report to PDF.
- Click on "File" in the menu.
- Select "Export As" and choose "PDF."
- Set export options and click "Finish" to generate the customized PDF report.
Step 10: Test Interactivity (Optional)
If your report contains interactive elements, test them in a PDF viewer.
- Open the exported PDF in a compatible viewer.
- Interact with parameters and observe the dynamic changes.
Step 11: Save Your Customized Report
Ensure your changes are saved for future use.
- Click on "File" and choose "Save" or "Save As."
- Specify the location and name of your customized report.
The above steps will allow you to customize a PDF report in Jaspersoft Studio. This step-by-step guide should empower you to personalize your reports according to your needs, creating visually appealing and functionally rich documents.
Dynamic Parameterization
Jaspersoft allows dynamic parameterization that enables users to interact with reports. Dynamic parameterization in Jaspersoft allows you to create interactive PDF reports, enabling users to customize the output based on their specific criteria.
You can incorporate parameters such as date ranges or product categories, allowing users to tailor the report output based on their requirements. This dynamic feature enhances the versatility of your reports.
Follow this detailed step-by-step guide to implement dynamic parameters in your Jaspersoft PDF reports.
Step 1: Open or Create a Report
- Launch Jaspersoft Studio and open the report to which you want to add dynamic parameters.
- If you haven't created a report, refer to the previous guide for creating a new report.
Step 2: Access the Parameters Tab
- Click on the "Parameters" tab in Jaspersoft Studio.
- This tab displays a list of existing parameters or allows you to create new ones.
Step 3: Create New Parameters
- Right-click within the Parameters tab.
- Select "Create Parameter" to add a new parameter.
- Specify the parameter's name, data type, and default value.
Step 4: Set Parameter Properties
- Select the newly created parameter.
- Navigate to the "Properties" tab to configure additional settings.
- Adjust properties like display name, prompt, and whether the parameter is mandatory.
Step 5: Use Parameters in Query
- Switch to the "Data" tab to access the report's dataset.
- Modify the query to include the dynamic parameter.
- Use the parameter in the WHERE clause to filter data based on user input.
Step 6: Design Report Elements Linked to Parameters
- Go back to the "Design" tab.
- Drag and drop report elements that will be affected by the dynamic parameter onto the canvas.
- Bind these elements to the corresponding parameters.
Step 7: Configure Dynamic Visibility (Optional)
For a cleaner interface, configure dynamic visibility based on parameter values.
- Select an element on the report.
- Navigate to the "Properties" tab and find the "Print When Expression" property.
- Use an expression involving the parameter to control the visibility.
Step 8: Preview Report with Dynamic Parameters
- Click on the "Preview" tab.
- Test the report by entering different values for dynamic parameters.
- Observe how the report dynamically adjusts based on user input.
Step 9: Export Report to PDF with Dynamic Parameters
- Click on "File" in the menu.
- Select "Export As" and choose "PDF."
- Set export options and click "Finish" to generate the PDF report with dynamic parameters.
Step 10: Deploy to Jaspersoft Server (Optional)
For centralized access, deploy the report to a Jaspersoft server.
- Connect to your Jaspersoft server within Jaspersoft Studio.
- Right-click on your report and choose "Publish."
- Specify the server location and credentials.
- Click "Finish" to deploy the report to the server.
Step 11: Access Dynamic PDF Reports via Jaspersoft Server
- Open a web browser and navigate to the Jaspersoft server.
- Log in with appropriate credentials.
- Locate and click on the deployed report to access the dynamic PDF with interactive parameters.
Congratulations! You've successfully implemented dynamic parameterization in your Jaspersoft PDF report. This interactive feature enhances user experience, allowing them to customize the report output based on their specific criteria.

Conditional Formatting
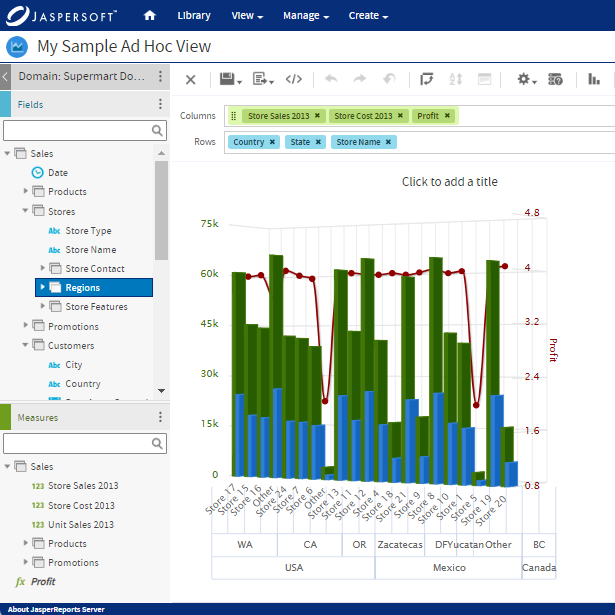
To highlight critical information, leverage Jaspersoft's conditional formatting capabilities. Apply formatting rules based on data values, ensuring important insights stand out. Use formatting, whether color-coded cells or bold text, to guide your audience's attention.
Conditional Formatting in Jaspersoft allows you to highlight and emphasize specific data points in your PDF reports based on predefined conditions. Follow this detailed step-by-step guide to implement conditional formatting in your Jaspersoft PDF reports.
Step 1: Open or Create a Report
- Launch Jaspersoft Studio and open the report you want to apply conditional formatting.
- If you haven't created a report, refer to the previous guide for creating a new report.
Step 2: Access the Design View
- Click on the "Design" tab to access the design view of your report.
- This is where you can adjust the layout and appearance.
Step 3: Select Report Element for Formatting
- Choose the report element (text field, image, etc.) to which you want to apply conditional formatting.
- Right-click on the selected element and choose "Properties."
Step 4: Navigate to Conditional Styles
- Within the "Properties" tab, find and click on the "Conditional Styles" section.
- This section allows you to define formatting rules based on specific conditions.
Step 5: Add a New Conditional Style
- Click the "Add" button to create a new conditional style.
- Define a condition by setting criteria based on data values.
Step 6: Specify formatting for the Condition
- Configure the formatting options for the selected Condition, such as font color, background color, and font style.
- These settings determine how the element will appear when the Condition is met.
Step 7: Add Multiple Conditions (Optional)
- If needed, add multiple conditions to the same element.
- Each Condition can have its unique formatting rules.
Step 8: Test the Conditional Formatting
- Click the "Preview" tab to test how the conditional formatting affects the report's appearance.
- Adjust data values to see real-time changes in formatting based on conditions.
Step 9: Apply Formatting to Other Elements (Optional)
- Repeat the process for other report elements that require conditional formatting.
- Ensure consistency in formatting rules across different elements.
Step 10: Save Your Changes
- Click on "File" and choose "Save" to save your changes to the report.
Step 11: Export Report to PDF
- Click on "File" in the menu.
- Select "Export As" and choose "PDF."
- Set export options and click "Finish" to generate the PDF report with conditional formatting.
Step 12: Deploy to Jaspersoft Server (Optional)
For centralized access, deploy the report to a Jaspersoft server.
- Connect to your Jaspersoft server within Jaspersoft Studio.
- Right-click on your report and choose "Publish."
- Specify the server location and credentials.
- Click "Finish" to deploy the report to the server.
Step 13: Access PDF Reports with Conditional Formatting
- Open a web browser and navigate to the Jaspersoft server.
- Log in with appropriate credentials.
- Locate and click on the deployed report to access the PDF with conditional formatting.
Following the above steps allows you to apply conditional formatting to your Jaspersoft PDF report successfully. This feature allows you to visually emphasize important information based on specific conditions, enhancing the readability and impact of your reports.
Tools and Techniques for Generating PDF Reports
Now that you've laid the foundation by understanding your audience and customizing reports, let's explore the various tools and techniques Jaspersoft offers for generating PDF reports.
JasperReports Library
JasperReports has a powerful Java reporting library. It allows seamless integration with your Java applications, enabling you to generate PDF reports programmatically. This library supports dynamic data sources, making it ideal for real-time reporting.
Custom Generators
For advanced users, Jaspersoft provides the flexibility to create custom report generators. Creating reports using the software involves coding specific functionalities tailored to your business needs. While it requires programming skills, the payoff is a highly customized and efficient reporting solution.
Integrating Data Sources
Jaspersoft Studio integrates with various data sources, including databases, XML, and JSON. This flexibility ensures you can pull data from multiple platforms to create comprehensive reports. Leverage the power of SQL queries or use drag-and-drop functionalities to integrate data effortlessly.
Deploying Reports Effectively
Creating reports is only half the battle; the other half involves deploying them effectively for consumption. Jaspersoft offers several deployment options to ensure your reports reach the right audience.
Deploying reports on a Jaspersoft server provides a centralized location for accessing and managing reports. This approach facilitates version control, security, and collaboration among team members. Users can access reports through web browsers, ensuring seamless accessibility.
Exporting to Various Formats
Jaspersoft allows you to export reports in various formats, including PDF, Excel, and HTML. This versatility ensures that your reports can be shared in the most convenient format for your audience. Whether it's a detailed PDF for executives or an Excel sheet for further analysis, Jaspersoft has you covered.
Best Practices for Creating PDF Reports
Creating high-quality PDF reports involves understanding your audience, designing reports for impact, and utilizing the platform's diverse tools and techniques. Whether you're a beginner exploring the drag-and-drop features or an advanced user coding custom generator, Jaspersoft provides the flexibility and functionality needed to meet your reporting requirements.
Remember, effective reporting is not just about data; it's about telling a compelling story with your data. By following the guidelines in this guide and harnessing the capabilities of Jaspersoft, you can elevate your reporting game and deliver insights that drive informed decision-making in your organization.
Conclusion
PDF reports are an excellent way to create professional-looking reports that are easy to share and distribute. They offer a range of benefits, including portability, security, and ease of use. You can create high-quality PDF reports that impress your clients and colleagues by following the steps listed in this article.
Remember to keep your audience in mind when creating your reports and to use clear, concise language that is easy to understand. With these tips in mind, you'll be well on your way to creating PDF reports that are both informative and visually appealing.
Create PDF Reports with Jaspersoft
Related Resources
Jaspersoft in Action: Embedded BI Demo
See everything Jaspersoft has to offer – from creating beautiful data visualizations and dashboards to embedding them into your application.
Back to Basics: Reporting 101
Discover the fundamentals of delivering reporting to users wherever they are and in a variety of formats.
